
In the scenario discussed in this chapter, the hosts on the corporate network are members of a domain that has its domain controllers located behind the network services perimeter ISA firewall.
An Access Rule must be created allowing hosts on the corporate network to communicate with the domain controller on the network services segment. Intradomain communications require that you have a Route relationship between the source and destination networks. For this reason, we will create a network rule that sets a Route relationship between the corporate network and the default internal network located behind the network services perimeter ISA firewall.
It’s important to note that although there will be a Route relationship between the network services perimeter ISA firewall’s default internal network and the Corpnet network, there will still be a NAT relationship between the network services perimeter ISA firewall’s default internal network and the Internet.This is fully supported (and required), because private addresses are used on all networks behind the edge ISA firewall (in this scenario).
Creating the Network Rule Defining a Route Relationship between the Corpnet ISA Firewall Network and the Default Internal Network
Perform the following steps to create the network rule creating a Route relationship between the Corpnet network and the default internal network behind the network services perimeter ISA firewall:
-
In the ISA firewall console, expand the server name and then expand the Configuration node in the left pane of the console. Click the Networks node.
-
On the Networks node, click the Network Rules tab in the Details pane of the console, then click the Create a New Network Rule link in the Tasks tab of the Task pane.
-
On the Welcome to the New Network Rule Wizard page, enter a name for the rule in the Network rule name text box. In this example, we’ll name the rule Corpnet—Internal (the default internal network behind the network services perimeter ISA firewall represents the network services segment). Click Next.
-
On the Network Traffic Sources page, click the Add button.
-
In the Add Network Entities dialog box, click the Networks folder and then double click the Corpnet network. Click Close (see Figure 10.10).
-
Click Next on the Network Traffic Sources page.
-
Click Add on the Network Traffic Destinations page.
-
Click the Networks folder and then double click the Internal entry. Click Close.
-
On the Network Relationship page, select the Route option and click Next (see Figure 10.11).

Figure 10.11: Specifying That the ISA Server Should Send Traffic between the Source and Destination Network Entities -
Click Finish on the Completing the New Network Rule Wizard page. Figure 10.12 shows the results.


Creating an Intradomain Communications Access Rule on the Network Services Perimeter ISA Firewall and a DNS Server Publishing Rule
Multiple protocols are required to allow intradomain communications between hosts on the corporate network and domain controllers on the corporate network.Table 10.1 provides the details of this Access Rule.Table 10.2 provides details of the DNS Server Publishing Rule.
| Name | Intradomain Corpnet—Internal |
| Action | Allow |
| Protocols
| Microsoft CIFS (TCP) Microsoft CIFS (UDP) Kerberos-Adm (UDP) Kerberos-Sec (TCP) Kerberos-Sec (UDP) LDAP LDAP (UDP) LDAP GC (Global Catalog) RPC (all interfaces) NTP (UDP) Ping |
| From | Corpnet |
| To | Domain Controller |
| Users | All |
| Schedule | Always |
| Content Types | All Content Types |
| Name | Publish Domain DNS |
| Action | Allow |
| Protocols | DNS Server |
| Listener | Corpnet |
| To | 10.0.0.2 |
| Schedule | Always |
Note that we are using an Access Rule rather than a Publishing Rule to allow access from the Corpnet ISA firewall network and the network services segment network.This is because we have a Route relationship between these two networks. As such, we have no need or ability to hide the addresses of the servers on the network services segment.
You might be concerned that you won’t be able to leverage the ISA firewall’s deep application layer inspection application filters when using Access Rules, but the fact is that you can benefit from the application layer filters for most protocols. If you check the protocol definitions associated with the application filters, you’ll see that both inbound and outbound protocol definitions have the application layer inspection filters bound to them.
Unfortunately, the DNS filter is not one of the filters that you can use for both inbound and outbound access to stateful application layer inspection. Even though you can bind the DNS application layer inspection filter to the outbound DNS protocol definition in the user interface, the filter will have no effect.
You can test this yourself by binding the DNS application layer inspection filter to the outbound DNS protocol and then creating an Access Rule from the Corpnet network to the network services segment network using this DNS protocol definition. Now block DNS zone transfers in the Enable Intrusion Detection and DNS Attack Detection dialog box. After creating the Access Rule and configuring DNS intrusion detection, try to perform a DNS zone transfer using the nslookup utility and issuing the ls –d
For this reason, we will create two rules: a Server Publishing Rule for DNS communications and an Access Rule for all other intradomain communications. Although we could simplify the configuration by including the DNS protocol in the intradomain communications Access Rule, we would miss out on the added protection provided by the DNS filter.
Creating the Intradomain Communications Rule
Perform the following steps to create the intradomain communications Access Rule on the network services perimeter ISA firewall:
-
In the ISA firewall console, expand the server name and then click the Firewall Policy node in the left pane of the console.
-
On the Firewall Policy node, click the Tasks tab in the Task pane and click the Create New Access Rule link.
-
On the Welcome to the New Access Rule Wizard page, enter the name of the rule in the Access Rule name text box. In this example, we’ll name the rule Intradomain Corpnet—Internal. Click Next.
-
Select the Allow option on the Rule Action page.
-
On the Protocols page, select the Selected protocols option from the This rule applies to list. Click Add.
-
Click the Add Protocols folder and then double click the following protocols:
Microsoft CIFS (TCP)
Microsoft CIFS (UDP)
DNS Kerberos-Adm (UDP)
Kerberos-Sec (TCP)
Kerberos-Sec (UDP)
LDAP LDAP (UDP)
LDAP GC (Global Catalog)
RPC (all interfaces)
NTP (UDP)
Ping
-
Click Close in the Add Protocols dialog box.
-
Click Next on the Protocols page (see Figure 10.13).
-
On the Access Rule Sources page, click the Add button.
-
In the Add Network Entities dialog box, double click the Corpnet entry and then click Close.
-
Click Next on the Access Rule Sources page.
-
Click Add on the Access Rule Destinations page.
-
In the Add Network Entities dialog box, click the New menu and then click Computer.
-
In the New Computer Rule Element dialog box, enter a name for the domain controller on the internal network (the network services segment). In this example, we’ll name the computer Object Domain Controller. Enter the IP address of the domain controller in the Computer IP Address text box. Enter an optional Description if you like. Click OK (see Figure 10.14).

Figure 10.14: Naming the Domain Controller on the Internal Network -
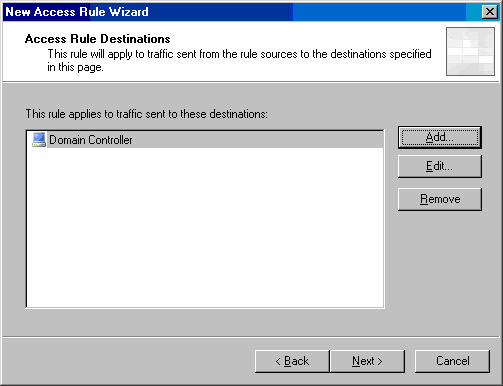
In the Add Network Entities dialog box, click the Computers folder and then double click on the Domain Controller entry. Click Close.
-
Click Next on the Access Rule Destinations page (see Figure 10.15).
-
Accept the default setting, All Users, on the User Sets page and click Next.
-
Click Finish on the Completing the New Access Rule Wizard page.


Creating the DNS Server Publishing Rule
The next step is to create the DNS Server Publishing Rule. Perform the following steps on the network services perimeter ISA firewall to create the DNS Server Publishing Rule:
1. In the ISA firewall console, expand the server name and then click the Firewall Policy node.
-
On the Firewall Policy node, click the Tasks tab in the Task pane and then click the Create a New Server Publishing Rule link.
-
On the Welcome to the New Server Publishing Rule Wizard page, enter a name for the rule in the Server Publishing Rule name text box. In this example, we’ll name the rule Publish Domain DNS. Click Next.
-
 On the Select Server page, enter the IP address of the DNS server for the domain in the Server IP address text box. In this example, the domain’s DNS server is located on the domain controller, which is at IP address 10.0.0.2.We enter this IP address into the text box and click Next (see Figure 10.16).
 -
On the Select Protocol page, select the DNS Server option from the Selected protocol list. Click Next (Figure 10.17).
-
On the IP Address page, put a checkmark in the checkbox next to Corpnet and click Next (see Figure 10.18).There is an interesting vagary to this setting, which I’ll talk more about at the end of this section.

Figure 10.17: Selecting the Protocol
Figure 10.18: Choosing the Networks That Will Listen for Requests -
Click Finish on the Completing the New Server Publishing Rule Wizard page.


I mentioned that there is an interesting twist to Server Publishing Rules when you have a Route relationship between the source and destination ISA firewall networks.To fully appreciate the situation, let’s first examine what happens when there is a NAT relationship between the published server and the external client.
When there is a NAT relationship between the published server and the external client, the external client reaches the published server using the IP address on the external interface of the ISA firewall configured to listen for incoming connections for that specific Server Publishing Rule.
For example, if there were a NAT relationship between the published DNS server and the Corpnet network, we could choose the IP address 10.0.1.2 on the external interface of the network services perimeter ISA firewall as the listening address. Hosts that need to reach the published server would send DNS queries to the IP address used in the Server Publishing Rule listener, not the actual IP address of the published Web server.
In contrast, when there is a Route relationship between the source and destination ISA firewall networks, the external client reaches the published DNS server (or any other server except a Web server published using a Web Publishing Rule) using the actual IP address of the published server. So, even though we’ve created a DNS Server Publishing Rule that has a listener on the external interface of the network services perimeter ISA firewall, the external clients must use the actual IP address to reach the DNS server, which in this case is 10.0.0.2. The ISA firewall uses a method referred to as port stealing to make this possible.
0 comments
Post a Comment